I installed Oracle Database 11gR2 on Oracle Solaris11 box using VM virtual machine, so I'd like to share my work with you.
I had used Oracle provided default configured Solaris Server VM image which you can download using the below link.
Oracle Solaris 11.1 VM for Oracle VM VirtualBox
I found somewhat sophisticated to edit the file using "vim" in Solaris than Linux, So I preferred "cat" command for the same.
As the root user I issued the following steps.
Host file
Made an entry in the "/etc/hosts" file which should have the system IP address as well as the machine name.
Kernel Parameters
# projadd oracle
Append the below line to the "/etc/user_attr" file
oracle::::project=oracle
Changed the "max-shm-memory" to 4gb from default value.
To reset this value, make sure at least one session is logged in as the oracle user.
# prctl -n project.max-shm-memory -v 4gb -r -i project oracle
# projmod -s -K "project.max-shm-memory=(priv,4gb,deny)" oracle
The above command dynamically change the value, so to keep the changes permanently made a changes
to the "/etc/project" file.
# cat /etc/project
system:0::::
user.root:1::::
noproject:2::::
default:3::::
group.staff:10::::
oracle:100::::project.max-shm-memory=(priv,4294967296,deny)
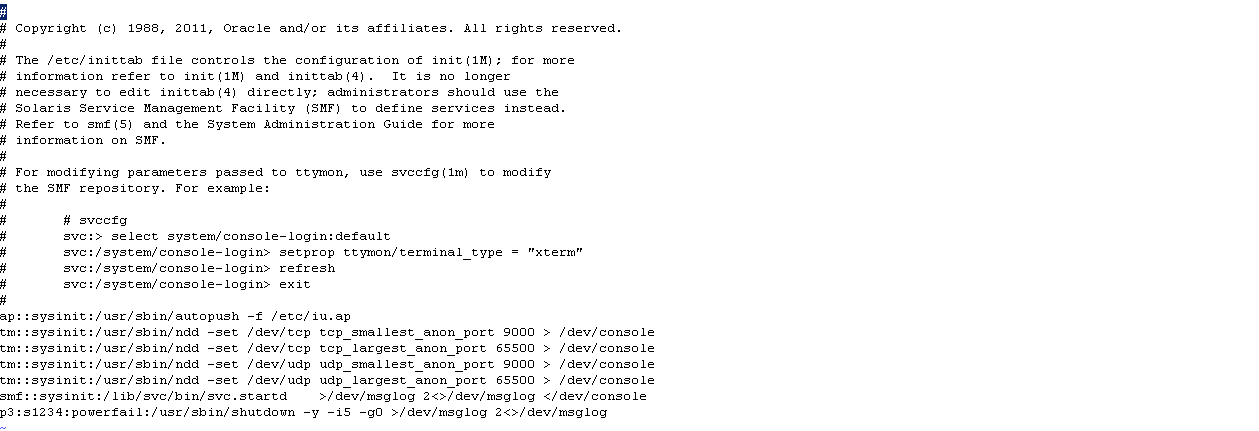
Add the below lines to the "/etc/inittab" file, immediately just before the entry for "startd".
tm::sysinit:/usr/sbin/ndd -set /dev/tcp tcp_smallest_anon_port 9000 > /dev/console
tm::sysinit:/usr/sbin/ndd -set /dev/tcp tcp_largest_anon_port 65500 > /dev/console
tm::sysinit:/usr/sbin/ndd -set /dev/udp udp_smallest_anon_port 9000 > /dev/console
tm::sysinit:/usr/sbin/ndd -set /dev/udp udp_largest_anon_port 65500 > /dev/console
Append the below line to the "/etc/system" file.
set maxusers=16384
Setup
To check the required packages which are already installed.
# pkginfo -i SUNWarc SUNWbtool SUNWhea SUNWlibC SUNWlibm SUNWlibms SUNWsprot \
SUNWtoo SUNWi1of SUNWi1cs SUNWi15cs SUNWxwfnt SUNWcsl
To add the required package
# pkgadd -d /cdrom/sol_10_910_x86/Solaris_10/Product "package name"
Create the new groups and users.
groupadd oinstall
groupadd dba
groupadd oper

useradd -g oinstall -G dba -d /export/home/oracle oracle
mkdir /export/home/oracle
chown oracle:oinstall /export/home/oracle
passwd -r files oracle
I got default configured server image, hence no mount point as "/u01".
So, I created directory as "/u01" and the soft link which will point the installing
directory which is "/export/home/oracle".
mkdir -p /export/home/oracle/u01
ln -s /export/home/oracle/u01 /u01
mkdir -p /u01/app/oracle/product/11.2.0/db_1
chown -h oracle:oinstall /u01
chown -R oracle:oinstall /export/home/oracle/u01
From Oracle user.
cat >> /export/home/oracle/.profile
# Oracle Settings
TMP=/tmp; export TMP
TMPDIR=$TMP; export TMPDIR
# Select the appropriate ORACLE_BASE
ORACLE_HOSTNAME=dba.cybage.com; export ORACLE_HOSTNAME
ORACLE_UNQNAME=orcl; export ORACLE_UNQNAME
ORACLE_BASE=/u01/app/oracle; export ORACLE_BASE
ORACLE_HOME=$ORACLE_BASE/product/11.2.0/db_1; export ORACLE_HOME
ORACLE_SID=orcl; export ORACLE_SID
PATH=$ORACLE_HOME/bin:$PATH; export PATH
Activate the above changes.
# . .profile
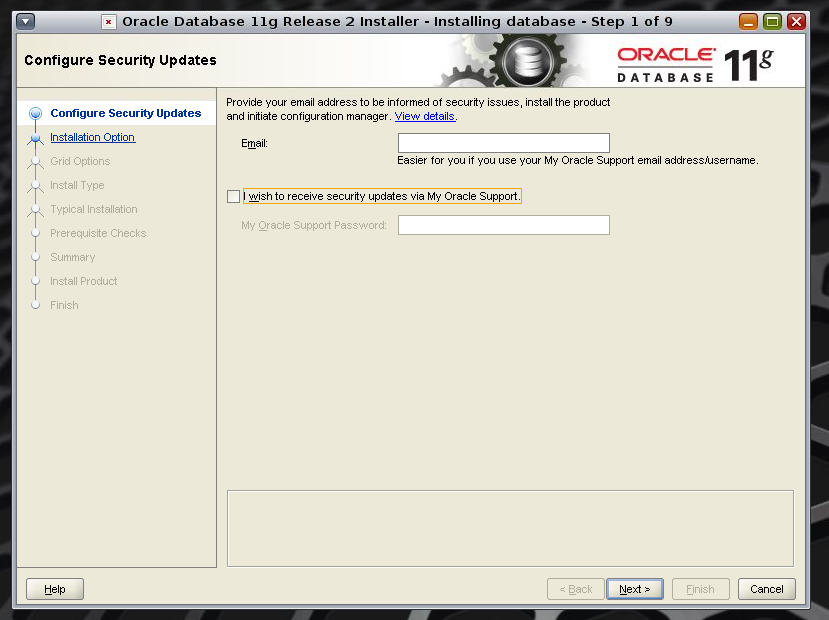
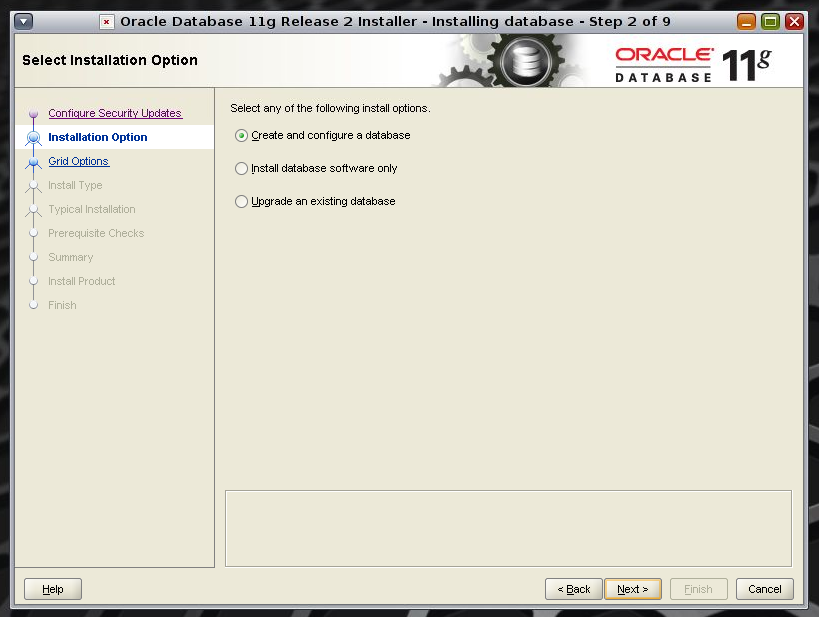
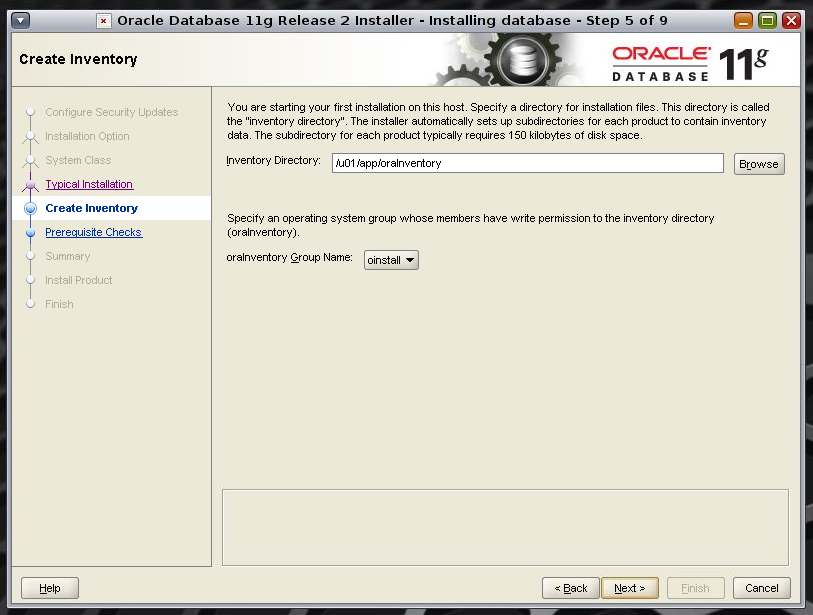
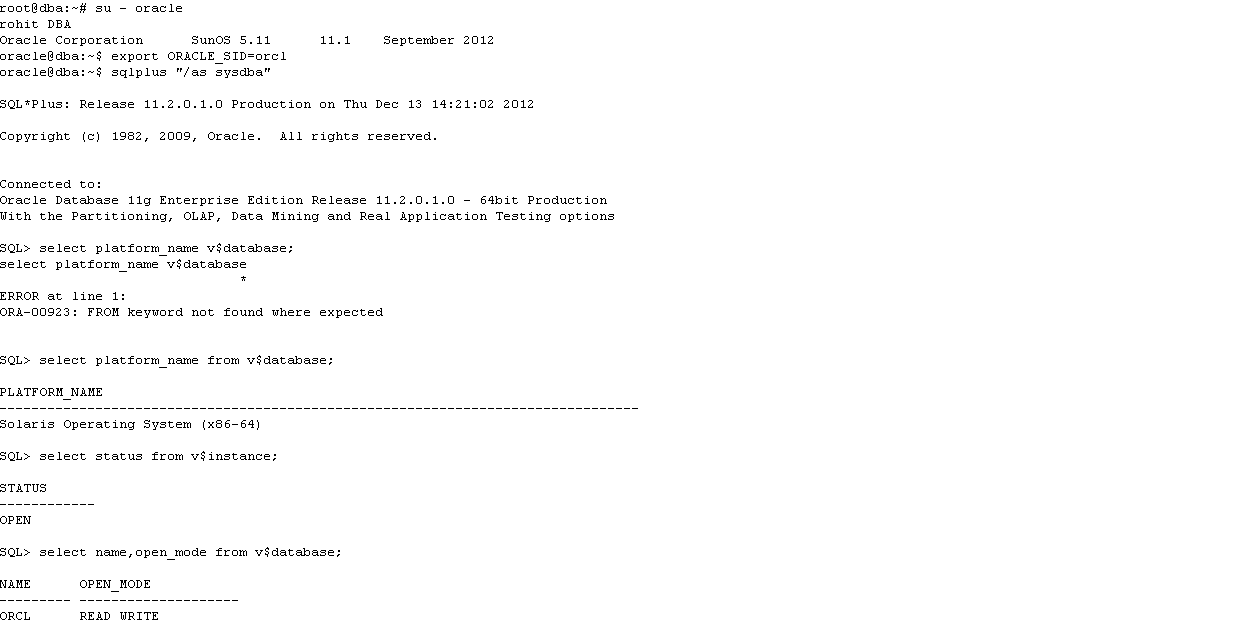
Installation
Login as the Oracle as run the installer
#./runInstaller
Once the installation gets complete, run the below script from root user.
#/u01/app/oraInventory/orainstRoot.sh
#/u01/app/oracle/product/11.2.0/db_1/root.sh